Thursday, March 7, 2013

Prop & Backdrop Storage Ideas

So when I say my studio space is small, I mean it's itty bitty! I took over our spare bedroom in our 1000 square foot, three bedroom house and it's maybe 10' by 12'? Don't ask me what we'll do when we have baby #3... Take over the garage? (for the studio, not the baby ;-) 
 
Such a humble shooting space is not ideal, but it's do-able and it works for me (much better than taking over the living room antime I wanted to do an indoor shoot!) This room has been a work-in-progress for about a year now, and I don't think I will ever really be finished with it. Is anyone else like that? I'm always coming up with something else I want done! But working in such a small space you have to maximize every inch, including vertical wall space!
 
I had my dad build this backdrop storage rack based on this picture I found from Cindy Ellis here. 
 

I use the bottom peg to also tie up my buntings and banners. I love having everything on display so that my customers can see all the options they have available. I store our backdrops (many of which are available--for a super affordable price--in the Etsy shop and will ship out within one to three business days) If you're also wondering why I use two PVC lengths for each backdrop, chech out this post here for an easy backdrop stand tutorial!


See how the top peg is a little longer in this picture? That's the 5' length, and I used to just hang the backdrop that was in use off of that one, but it didn't work so well to have the backdrop hanging on the wall next to the door. It works much better for the flow in the room (if you can have a "flow" in a few square foot space) to have the backdrop up on the opposite wall.

If I were to do anything different, I would've added more pegs and made them closer together, and also make the pegs longer so that it could hold two backdrops on each.  I never anticipated having more than 11 different backdrops... But I think I have closer to twice that many! Maybe it was foresight, but I didn't actually glue in the dowells. So now I've bought more dowell, I just need to find an afternoon to cut, paint and change them out.


This prop storage idea I found on pinterest from Jennifer Jayne Photography's post here. How genious! Once again, I want my clients to be able to see what's available!


I found these rod Clips to cost about 4x less per clip than the other ones, and they work just fine.

I also make 90% of my hats/diaper covers, rompers, etc. so maybe it's a pride thing that I want them on display and not kept in a dark tote or box somewhere? Haha
 
Isn't it beautiful? I'm so grateful for the internet.
I'm not sure I could come up with this stuff on my own!
 
 
Con cariño,

Alea

Wednesday, February 20, 2013

3-in-1 Photography Backdrop Stand Tutorial

An Adjustable Newborn, Child & Adult Backdrop Stand

Wow! I am still in shock at how many hits our last few posts have received from Pinterest. In response to the many requests for my backdrop stand design, I put together this step-by-step tutorial to share with you! Each image is sized at 4x6 so you are welcome to right-click save the images from this post and print them out for your own personal use. You are also welcome to pin or post a link to this tutorial, (just don't republish the tutorial, please!)

I've been using a PVC backdrop stand for over two years now and I've gone through many different configurations and designs. If you haven't played with PVC before, it's just like large-scale k'nex. The possibilities are endless! This past year or so I've seen so many PVC tutorials popping up, but all of them that I've seen have a major issue with the base. The only connection from the vertical pieces to the base support is at the floor level. That's not a huge issue when you're only a foot or two off the ground, but take it up five feet and add a backdrop and you're not going to be terribly stable. Add some supports, even just a foot or two off the ground and your stability will be multiplied. Safety is such a huge concern, especially when you are working with babies and children. Mom & Dad aren't going to be too happy if a backdrop collapses on Jr. during his cake smash session! That being said, this has been the design that has worked the best for me and my business, please use all equipment responsibly and make sure all pieces are secure before using in a session!

This is our (mine and my dad's... he's a genius builder) unique design that can be easily changed from a Newborn seamless blanket stand, to a child-sized stand, and then to an adult-sized stand. It works perfectly with our backdrops listed in our Etsy shop (here) with both bottom and top pole pocket casings to keep them as wrinkle-free and easy to manage as possible. If you like our tutorial, be sure to check out our shop for more photography goodies like chalkboard props, newborn wraps, newborn baskets, and unique client gift packaging.

Now, for the tutorial...


You will need:
*6 lengths of 3/4" PVC (they come in 10' lengths- buy extra if you have multiple backdrops to store and space to store them rolled up)
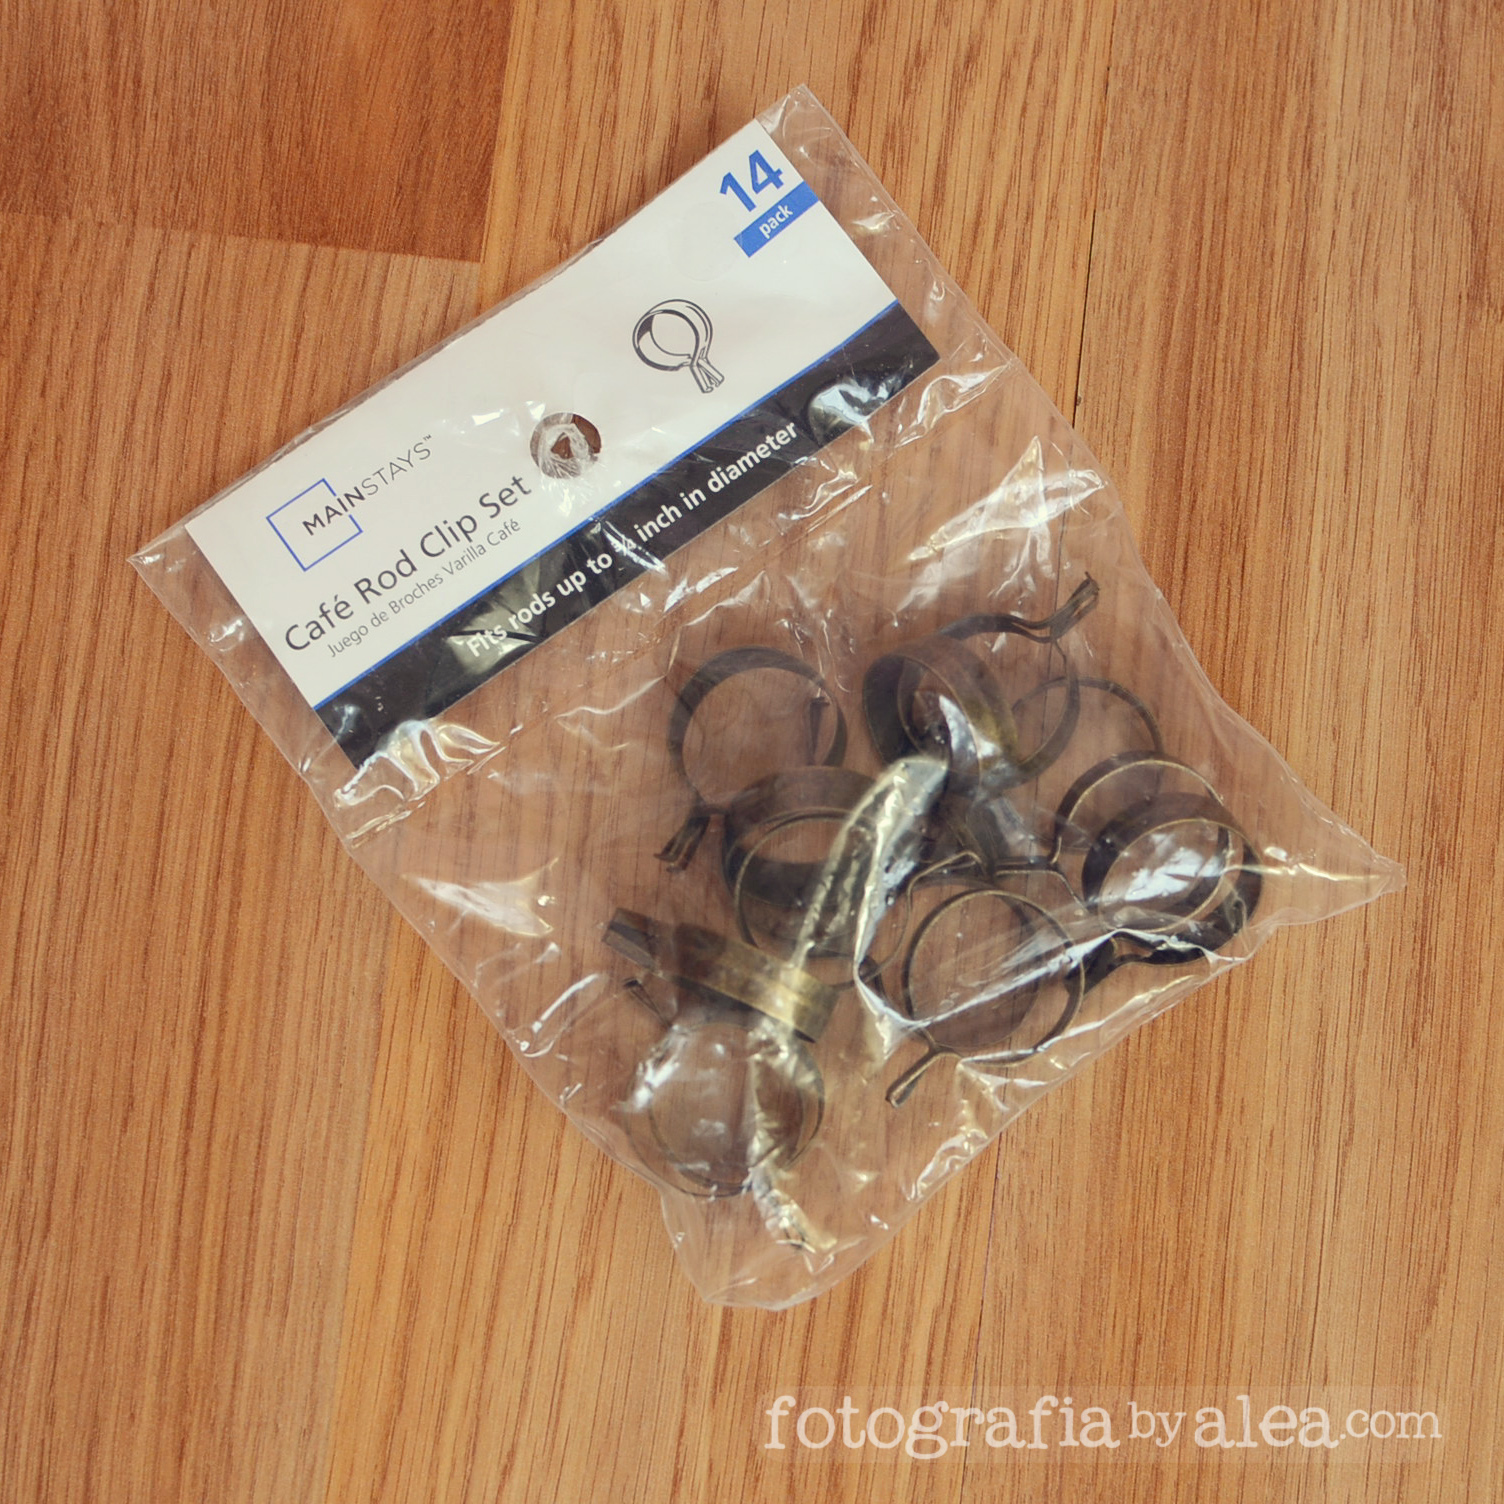
*The fittings listed below (regular slip style, not threaded. Also be sure you are grabbing the correct, 3/4" size. Sometimes the bins get mixed up. It might be cheaper to buy them in a bag, even if there are more in there than you need!)
*PVC cutters or a hack saw (I honestly prefer the hack saw- I had to get the hubs to cut with the PVC cutters, but I could work the hack saw just fine!)

The first step is to purchase your materials and cut the listed PVC lengths. You may be able to have the store cut your PVC to fit into your car if you don't have a truck. Have them cut each piece in half (5' lenghths) or do some of your handy-work in the parking lot and then you can make the rest of the cuts at home. Use a measuring tape and sharpie to mark before cutting.

*Update 2/26/13*
I adjusted the width to be 5 feet instead of 6 feet, like originally published. It is more sturdy and economical to use 5 foot lengths. Some of our backdrops are exactly 5 feet wide, so they won't fit on a 5 foot pole with fittings on the end, but if you use the "cheating" technique I explain after step #6, then it isn't an issue. :)

Now when I'm doing a newborn shoot, I will start with the seamless backdrop/blanket poses, then move to the baskets where I want an actual floor showing, then finish with the shots of mom & dad holding their new bundle of joy. I just find that to be the most efficient workflow. Obviously, if you were just doing a child session, you'd modify these first few steps.


You probably noticed that there is only one side support in the design. I've found that that is all I really need. I pose the baby (on my bean bag topped with a Boppy) to be almost parallel to the long, 6-foot crossbar with her head to the left and feet to the right. I'll get the back & side-lying poses that way, then when they're really sleepy, go for the folded arms/chin in hands poses. I rarely need the other side of the blanket held up because I do not find the "up the nose" angle flattering, but occasionally I do get the feet. If that is the case I have mom hold up the left side of the blanket for a few seconds while I get the shot.

The side support could easily be flipped and used on the left side of the stand.


As shown above, any time you are removing a 6-foot cross bar, I suggest pulling upwards, keeping the elbow joint and cross bar in tact. This will keep your base pieces more stable than pulling sideways on the cross bar and possibly loosening the joints below. Also when you're disassembling and storing your stand, I find it quicker and more convenient to leave some of the fittings attached. This serves multiple purposes: less time taken to remove each piece, helps to not loose joint pieces, and speeds up the process when you do set it back up again.


The cross bar in #5 is important and adds stability to your structure. Once again, attach the joints first before placing it on your stand.


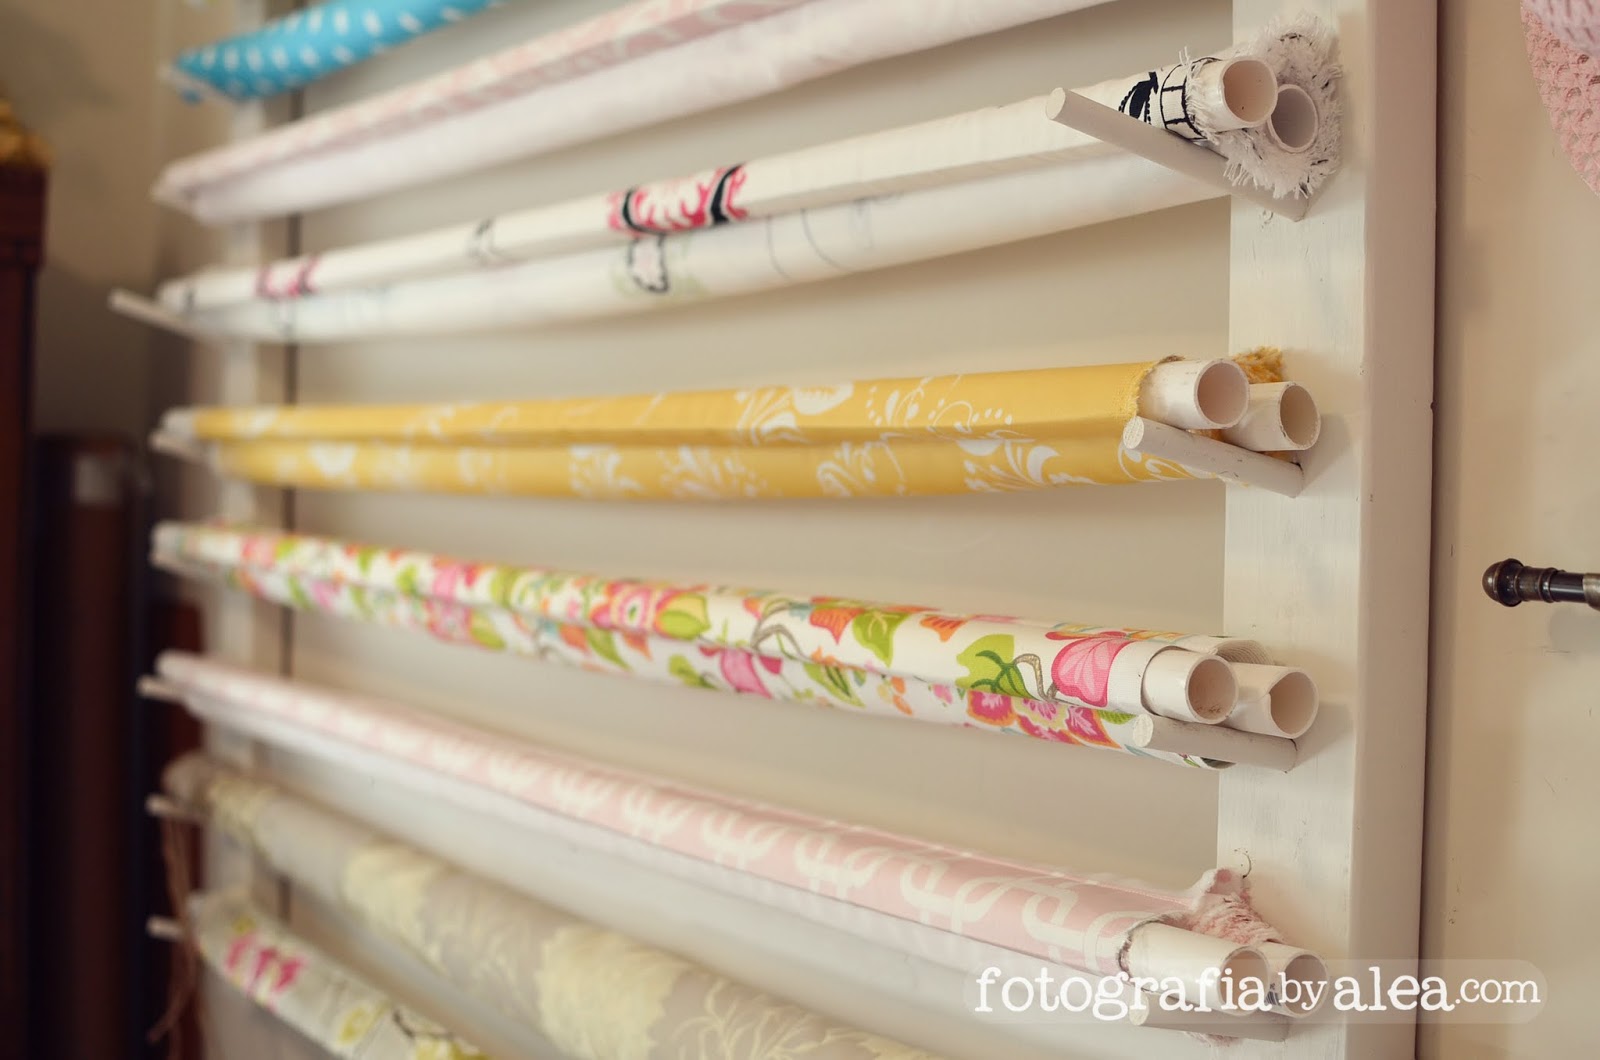
I have over two dozen fabric backdrops and I store them rolled up, each on a piece of PVC. Most of the time I even "cheat" when attaching my backdrops. If I plan on changing backdrops during a session (which I almost always do) I don't ever insert the fabric into the cross bar. Instead, I simply use the PVC pole that the backdrop is stored on, and toss it over the crossbar. The weight of it holds the drop up just fine, but I usually use clamps to secure it to be sure.


Our fabric backdrops come with two pole pockets, on the bottom and the top. I use a piece of PVC in the bottom of my drops for a few reasons: It provides weight and tension on the fabric, it makes for a quicker transition when I roll up my backdrop from the bottom instead of the top by keeping a little tension as I roll, and that same tension helps keep the backdrop straight when rolling, resisting wrinkles.

You should be able to find spring clamps in any hardware store, but I've found the best value is at Harbor Freight. I use them ALL THE TIME so pick up 8-10 of the little guys. Sometimes the print won't be exactly straight, or it just needs a little more tension on one side... Use the spring clamps to roll it up a bit and get it just right. I also angle them backwards so that the fabric is hanging on the front side of the bar, and that way you don't get a little dimple where the support cross bar is either. 


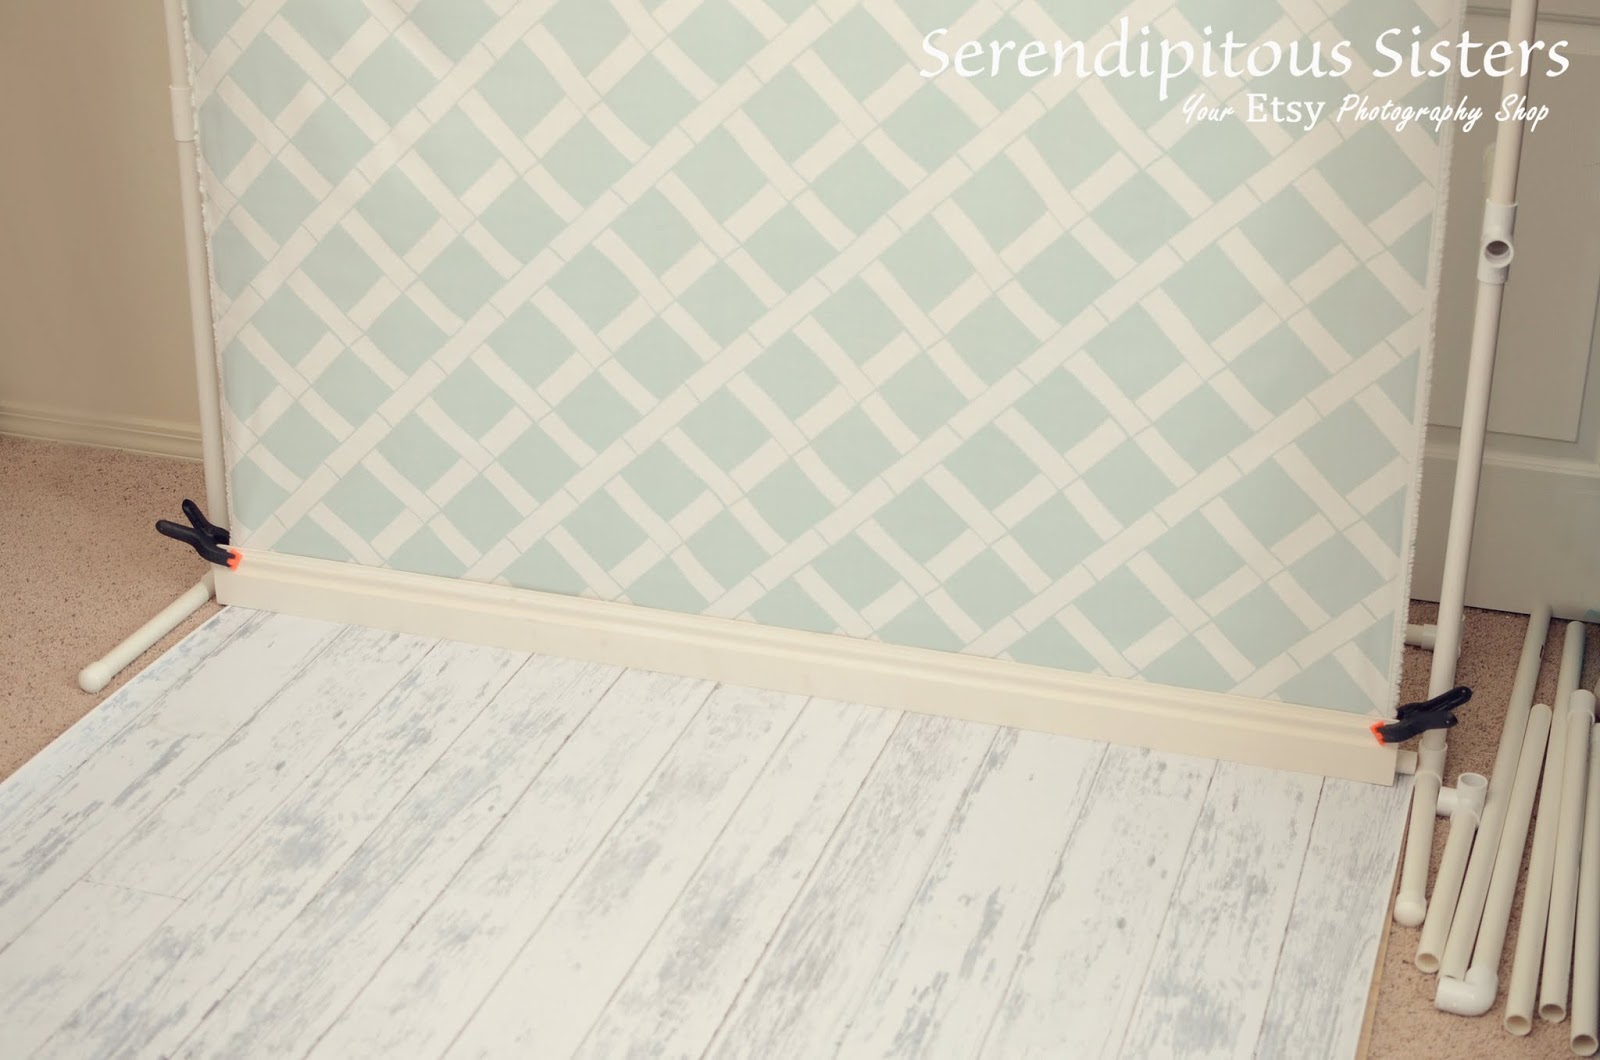
I clamp on either end of the baseboard and fabric to keep the board upright and to create more tension. You can find baseboards at any home improvement store. Some already have a white base coat and you can have them cut it for you (I'd suggest 5' for use with our backdrops.)


With both children and newborn sessions I include at least one shot with the parents (I don't think moms especially are in enough pictures with their kids!) so lastly I will raise up my stand for the group shots. Now, I don't have a large studio space. It's actually just a spare bedroom in my house. When you're working in client's homes you probably won't have a ton of available space either. So I only plan on getting back far enough for a upper torso/ head shot, which is what this last configuration is designed for. This would also work great for a wedding or party photo booth stand! 


Like I mentioned, I keep a piece of PVC in the bottom pole pocket. I do not attach it to anything, but just let it hang and keep the background taught with the weight of it. I also "cheat"with this one too. It doesn't look quite as nice, but to save on time I will  use additional T-joint fittings instead of the straight fittings and leave the child-sized crossbar in tact, then just add the two-foot pieces and top crossbar. Once again, I don't insert the crossbar into the fabric, I just use the pole it's stored on and drape it over the back. You may need to stand on a chair to set up this last one. Be careful!

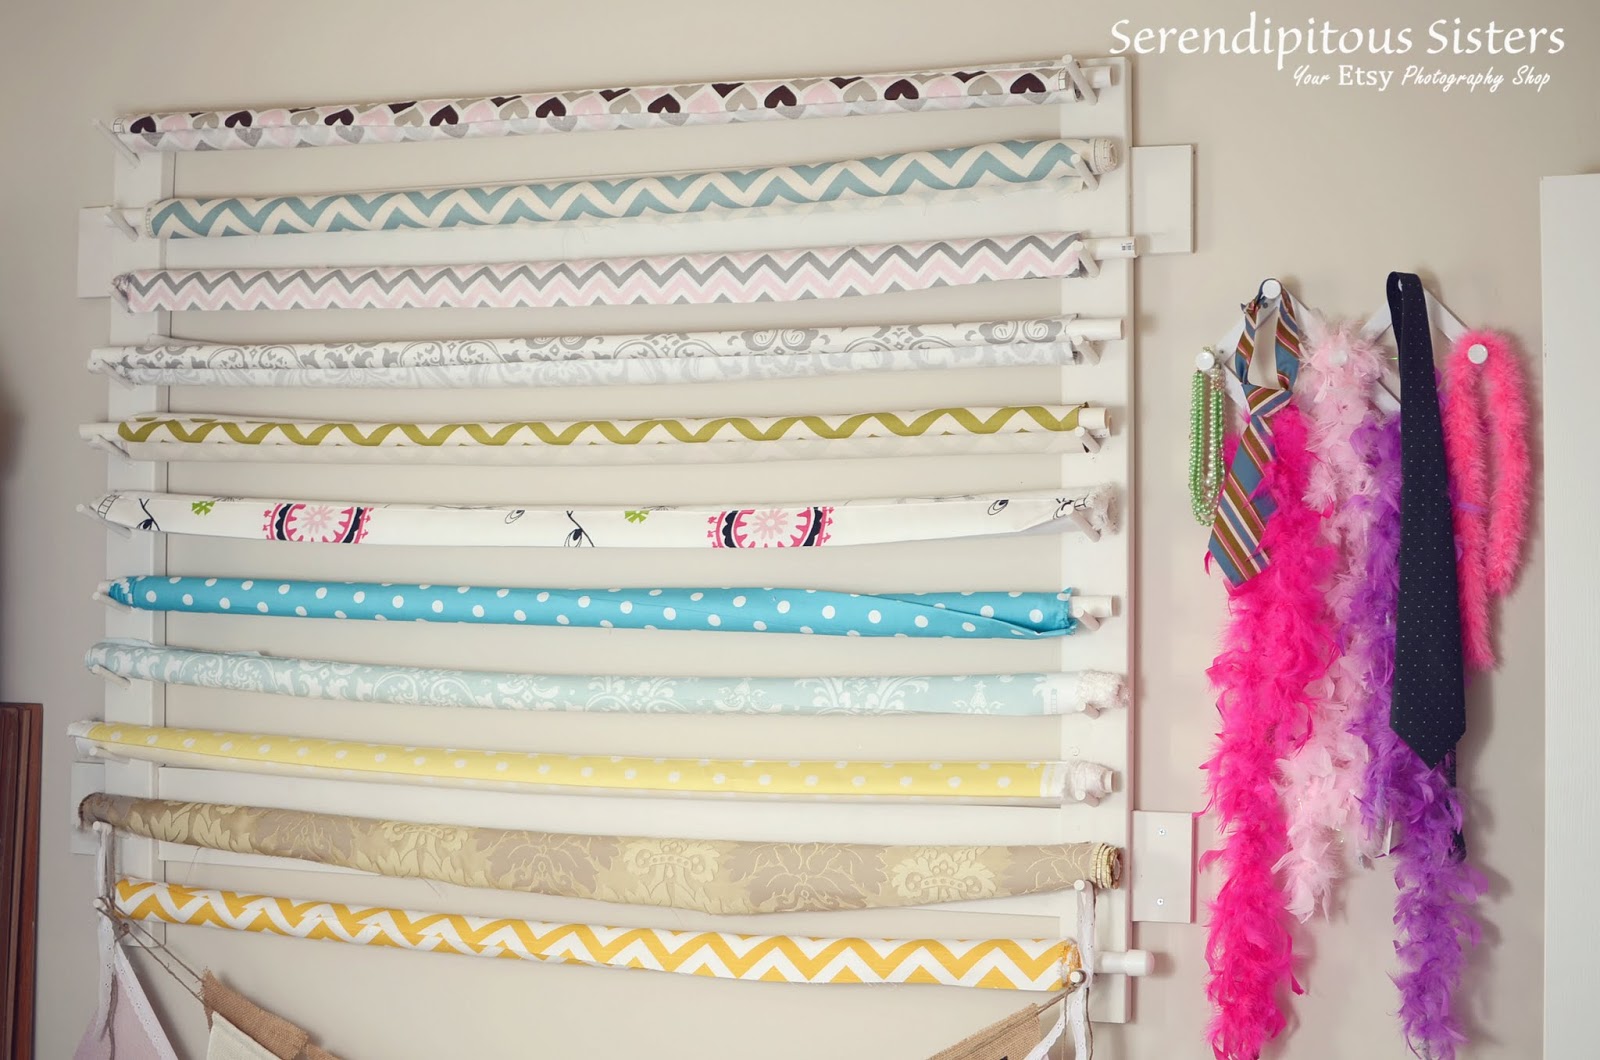
In the next few posts I'll talk about affordable flooring solutions, as well as my awesome backdrop storage system!


I hope you've enjoyed this tutorial. If you use it, I would love to hear your feedback and find out what you think! And to see more of our backdrops (and this stand) in use, check out my photography site: www.fotografiabyalea.com

Con cariño,
Alea

Friday, February 15, 2013

My Successful Little Photography Business

I have had a small portrait photography business that I started just over two years ago. It started from humble beginnings, building my portfolio and equipment a little at a time. I like where my business is at now, shooting 3-8 sessions a month depending on the season. It keeps me busy but still allows me to be home with my children much of the time. 


Now, something that a lot of new photographers don't think about is having a solid business plan. If you want to be successful you need to know your market, be smart with your finances, deal with legal issues, communicate with your clients, manage your time, market and promote your work (to name a few)... All on top of the creative/artistic part you fell in love with before you decided to go into business. 


So much of what I've learned has come from applying basic economic and business sense to my photography practice. I'm happy where I am now and have come a long way since I started, both artistically and entrepreneurially (I don't think that's a word...), but I'm always thinking of ways to improve. I believe that that is part of success in this world of photography- being willing to change and adapt. My approach may be somewhat nontraditional, but with photography I believe that the end product (the final images) are what clients value the most. 


So while my studio space may be (very) small, much of my equipment off-brand, and no assistant to help me much of the time, I think my clients understand as long as I deliver great images of them and their children. If they do value large studios and name-brand equipment, they have plenty of other options available. As to the overall quality, they know I am always giving my best and putting in the time to make their sessions enjoyable and their final images something they want to share and display.


 I love to create things. I love vintage. I love home-made. The shop Serendipitous Sisters was started because I wanted to make my own props & supplies for my photography business, and if I was making one, why not make a whole bunch of them to share? 

The first of many little prop projects...

My mom and sister joined in with some of their crafts, I got my dad to contribute his handy-man skills for a lot of my "projects," and then the shop transformed into what it is now. A bit later my mom opened another shop, River Road Rustics for wedding, event & decor items. Those two shops have been both of my parents' full-time jobs for over a year and a half now. 


The previous post on this blog has gone viral on Pinterest and received tens of thousands of hits over the past few weeks and multiple inquiries about my backdrop stand. I have come up with a lot of affordable photography solutions these past few years, stands included, and I am really excited to share them with you! In the mean time, check out the shop, Serendipitous Sisters for some fun photography backdrops, props & packaging supplies!

Thanks for reading.


Con cariño,
Alea

www.fotografiabyalea.com

Thursday, March 29, 2012

Affordable Photography Backdrops!

Our photography prop shop, Serendipitous Sisters, will now be offering super cute, super durable, super affordable photography backdrops!

Our backdrops are made from thick medium-weight cotton fabric which naturally resists wrinkling. They also do not give off an unsightly glare as many vinyl backdrops may have the tendency to do. Each has slightly different measurements (see the product descriptions on Etsy for exact measurements), but in general they are about 4 1/2 to 5 feet wide by 5 1/2 feet tall of useable, finished backdrop... Perfect for newborns, children, and adult head/torso shots!

There is a professional 2" casing (pocket) on the top and bottom which gives you utmost versatility in hanging your backdrops. Selvedge edges (the woven ends on the sides of the fabric) have been left intact in order to provide you with maximum width and durability.

I want to share with you some of my favorite ways to use these backdrops and make them look their best!
Here's a pullback of my portable PVC stand set-up. These backdrops would certainly work any regular photography stand as well. I either use natural light at about a 45 degree angle (depending on the space I'm setting up in) or use a combination of my strobe lights & a reflector. Proper lighting is SO IMPORTANT in making backdrops look good!

For a step by step tutorial on how to construct a sturdy PVC backdrop, see this post.


I insert my 3/4" PVC into the pocket and roll my backdrop to the perfect length for my stand. I use simple A-shaped spring loaded clamps (can be found at any hardware store- I got mine for .89 each at Harbor Freight) to secure the excess rolled fabric.


The clamps are angled slightly backwards so as to not create dimples in the fabric.

Here's where our backdrops are unique and help create the most wrinkle-free setup possible! There is a bottom casing sewn in, where you can insert a piece of PVC, and even without being secured on either side this will help keep tension on your backdrop and keep it from going anywhere you don't want it to! This is quicker and easier to transition from one backdrop to another than tucking it under your floor and baseboard.

For the best, wrinkle-free storage of your Serendipitous Sisters Photography Backdrop, simply roll it up onto the PVC starting from the bottom, maintaining slight tension as you roll. I keep mine hung horizontally on a custom-built rack (thanks dad!) but another good option would be in a closet, under a bed or couch or propped in a corner space.


I store mine with "wrong sides" out so that the front "pretty side" doesn't get dusty, dirty, sun-damaged, etc.


Backdrops may be folded (and will be shipped folded for the most cost-effective means of getting it to you!) but they may need ironed before each use. That being said, please plan on ironing (wrong side up) your backdrop before its first use after shipping.


As you can see, I really love PVC for all of it's amazing cost-effective usefulness (they come in 10-foot lengths for just a couple of dollars at home improvement stores!) and I love that I now have so many different options for pretty, proffessional backdrops that are SO EASY to use!

And finally... Here's a finished shot with the backdrop. I hope this post has been helpful and please feel free to leave a comment with any questions! Check out the shop for more fun, affordable, photography accessories!


*January 2013 Update*
We have received a few requests about the exact design of my PVC backdrop, as well as inquiries whether it is available for purchase. I will work on a detailed photo tutorial to post here soon within the next couple of weeks, as well as kits to be sold in our etsy shop.

Thanks for reading!

Wednesday, August 24, 2011

The Workshop

I snapped a few pictures of our workspace at the studio on River Road. I always love seeing other people’s workspace. We’re getting ready for a photo shoot of some new products for the shop!

2 034

This desk & hutch on the other side of the room was made by hand by one of our neighbors when we lived in Utah.

2 032

We always have some tunes going while we’re working… Usually 80’s pop! (That’s the best! My husband often disagrees with me though.)

2 036

This is an old handcart right outside the front door. This type of cart was used by the Mormon pioneers to travel across the country in the early 19th century. As the name suggests, it is pushed and pulled using man power! It makes for a fun backdrop.

2 039

There’s a small irrigation ditch that runs around the perimeter of the yard. It’s fun for boat races, panning for gold, and a pretend castle moat. My daughter Clara would much rather play in the ditch than in the kiddie pool we set up for her.

2 040

Here’s a scene we see a bit too much in our neck of the woods. There’s almost always a range fire burning somewhere close by in the summer months. This picture was taken from right outside the studio. It seems like at least every other year there’s a fire burning directly across the property and we are always crossing our fingers it doesn’t jump the river!

2 068

Here’s another scene we see quite a bit. Did you know it can get rather windy in Idaho? Mix in some dry dirt and you can get a pretty dramatic dust storm!

2 015